Not quite.
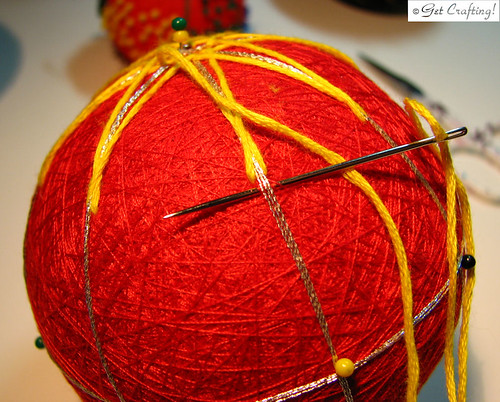
To recap: we've wrapped a core, measured and pinned it, then placed the guide lines.
In this next series of photos, we will start working on an 8 point star (kiku) pattern from two centres - the North and South poles. For this you'll need to choose at least 2 colours (I'm using three) of thread, plus a contrasting metallic thread.
For the coloured thread, cotton perle is recommended, but you can also use ordinary embroidery floss. For the metallic thread, I chose to stick with the same colour as the guide lines, but it can be any other colour you choose.
You will also need your sharp, large eyed needle, more pins, and I'd recommend keeping those pliers and thimble handy, too.
Oh, and another strip of paper to measure with. Snip a bit at one end so that you can slip it onto the North pin, as you did to the strip for measuring out the guide line pins earlier. For the pattern I'm doing hear, pencil in a mark 1 3/4 inches from the pin.
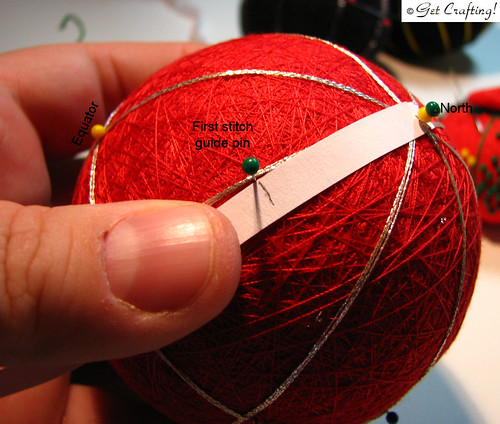
Place a guide pin at the mark at each guide line. After you've marked the Northern hemisphere, move the paper to the South pin and repeat the process.
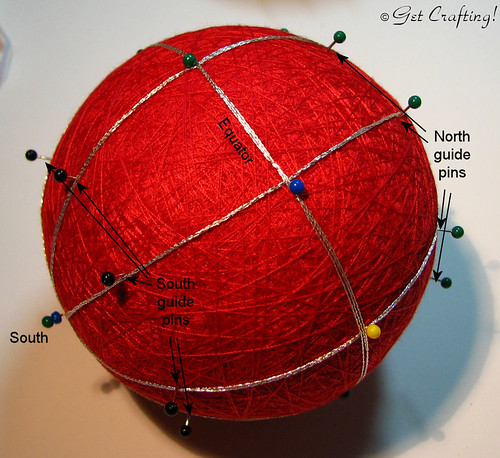
When you're done, you're going to have this hedgehog looking thing. There will be a North pin, a ring of 8 pins 1 3/4 inches from there, 8 pins marking the equator, another ring of 8 pins 1 3/4 inches from the South pin, and finally the South pin itself.
Now, finally, you can start stitching!
If you're not much of an embroiderer, no worries. Stitching the design involves tacking the design around a guide line, catching a few strands of sewing thread in the process. This is why wrapping that sewing thread randomly was so important. If the threads run in the same direction, your stitches would just slide out of place.
To begin!
For this part, I used the full 6 strands on the floss, so there was no need to split it like we did for the guide lines. Cut a length you're comfortable working with, thread your needle and tie a knot at one end.
To make an 8 point star, you will actually be stitching two overlapping 4 point stars.
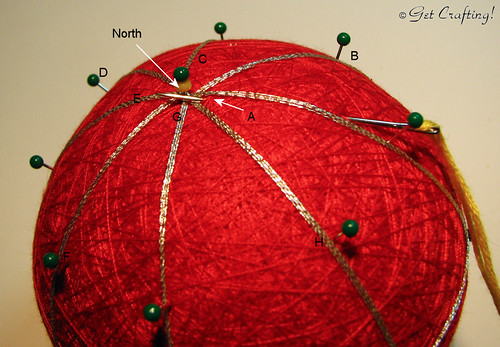
Insert your needle near one of the guide lines, so that the ends will be hidden after the knot is cut away, and bring it up on the left of a guide line as close to the North pin as you can get it. I have that point marked A in the diagram above. As with the guide lines, you may need to give it a few tries before you get it where it needs to be. Thumb digging may be required. Pliers may also be needed to pull the needle through.

Rotating the ball slightly clockwise, bring your needle down to the guide pin on the first guide line on the right, which I have marked as B. Insert the needle on the right of the guide line, just below the pin, and exit on the left, catching a few strands of the sewing thread in the process. Pull the thread through and rotate slightly clockwise again.
Bring your needle back up to the North pin, now working around the next guide line to the right, which I've marked C. Again working as close to the North pin as possible, make a stitch from right to left around the guide line.
Continue around the ball in this manner until you've made 4 points on your star, with the last point at the pin labeled H.
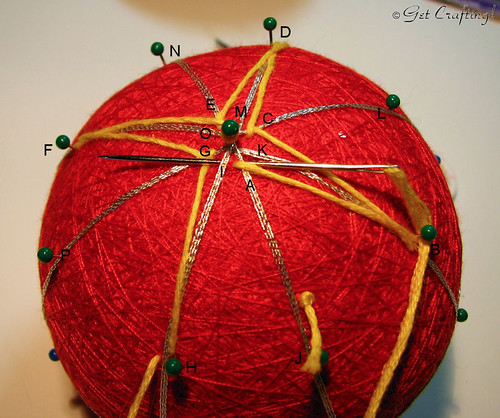
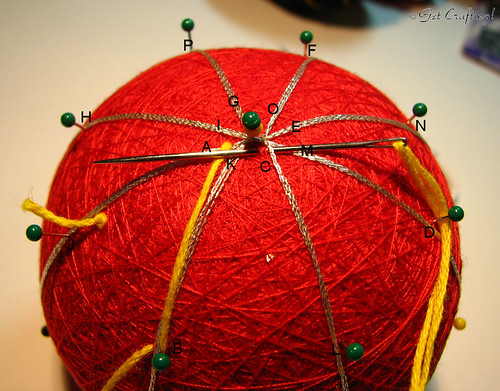
From point H, bring your needle back to point A. Insert the needle to the right of the guide line at point A, then exit to the left of the guide line at point I. Note that point I is on the same guide line as point H.
You are now beginning your second 4 point star.

From point I, rotate slightly clockwise and make a stitch at point J. Note that J is on the same guide line as point A.

Bring the strand up and to the right, working the next stitch at the North pin at point K. In this photo, you can see where I cut the beginning knot away. The bit of thread still visible will be hidden by the strands of thread.
Continue working around in this pattern to form another 4 points.

When you reach the end, insert the needle to the right of the guide line at point I. If you look closely at the photo (you can click on the image to go to my flickr page, where you'll have access to a slightly larger version), you can see I've exited the needle at point G, to the left of the guide line and slightly below the previous stitch. This is another time when manhandling things with your thumb helps to get the needle out in the correct location.
At this stage, you can remove the guide pins at the points.
Bring the strand down to the next point on the right, making your stitch slightly below the previous stitch.
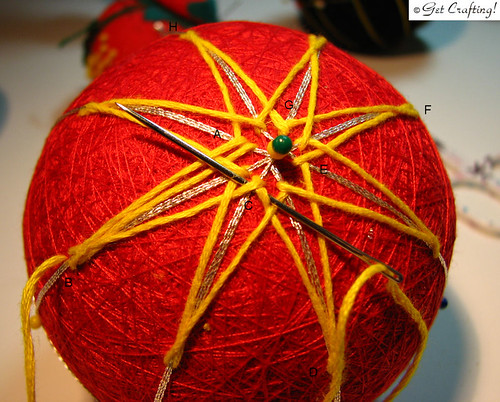
I like to refer to the first stitch in every round at point A. Since we have shifted over by one strand in the second round, what was point G before is now point A. After making your stitch at point B, bring your needle back up to the pin, labelled point C. Always working your needle from right to left, notice that the needle now runs under both strands of the previous stitch, as well as under the guide line.
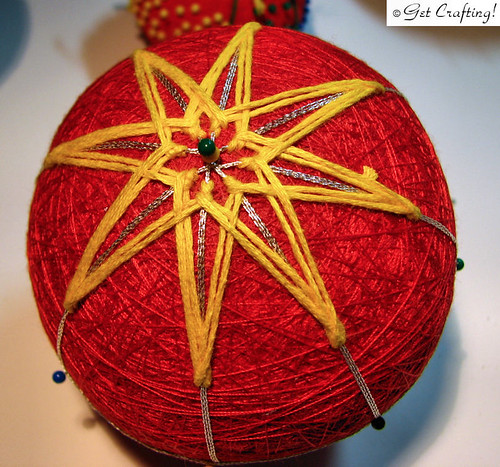
Continue working around for both overlapping stars. Finish off the thread by running it back and forth into the padding a time or two to anchor it.
Repeat all these steps around the South pin.
After this, it's time to switch colours. It's also time to let my husband have a turn at the computer, so it will wait until later!
No comments:
Post a Comment