For this part you will need a contrasting thread and your sharp, large eyed needle. For the thread, I usually use a metallic thread, which is available in a really nice variety of colours. I chose gold for my black mari, silver for the red.
Also handy; a pair of needle nose pliers (I was able to use the handles of one of my embroidery scissors instead, but pliers are really, really handy to have). Oh, and you might want a thimble, too. You can do without it, but I'd recommend using one.
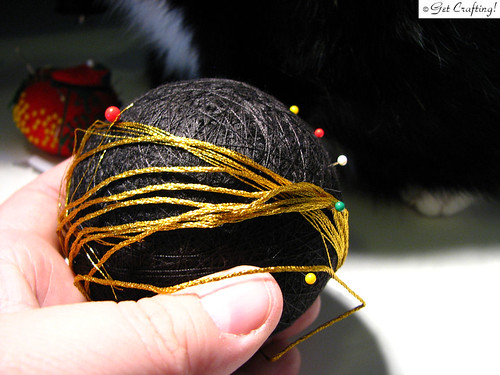
The length you'll need depends on how many divisions you have. For this mari, with 16 divisions, I will need it long enough to wrap around the circumference 8 times, plus once more to mark the obi at the equator, plus a bit extra for room to maneuver. Metallic strands tends to break and twist very easily, though, so you may want to use shorter lengths and restart a new length several times. Personally, I find fighting with the strands less annoying that restarting new lengths, so I went with one long piece. If you're not already used to working with metallic thread, go with several shorter lengths.
In this photo, I've wrapped the thread around 9 times, plus a few inches extra. It ended up being long enough to mark the longitudinal guidelines, but not the obi at the equator, which meant restarting a new length to do the obi.
Like regular cotton embroidery floss, the metallic floss comes in 6 strands twisted together to make the thread. This is too bulky for the purpose. Instead, I worked with 3 strands on the needle, carefully separating the length I measured in half. Take your time doing this, as the strands can get easily tangled and knotted. The easiest method is to grab one strand and slowly pull it out, then repeating until all the strands are separated. You can then group as many strands together as you want to work with.
After threading 3 strands onto the needle, tie a knot at one end.
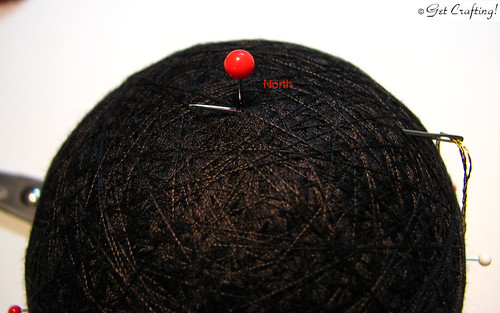
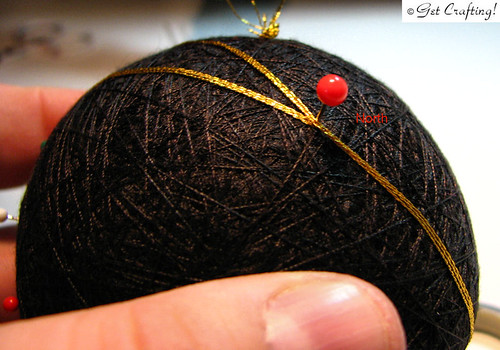
Starting at the North pin, insert your needle some distance away from the pin, through the padding of the mari, and bring the point up at the North pin. This will probably take several attempts to get it to emerge in the right place. I find digging my thumb down into the padding near the pin helps.
Yes, you'll be doing that a lot. For all their delicate appearance, you'll likely be rough handling your mari quite a bit! It's okay. They can take it.
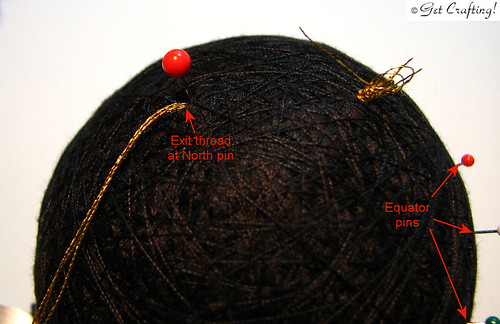
Once you've got the needle exiting where you want it, pull the thread all the way through until the knot is flush with the surface. Go ahead and use your pliers to pull the needle through. Don't yank it tight, at this point, though. You'll be doing that later, when you trim the knot away.
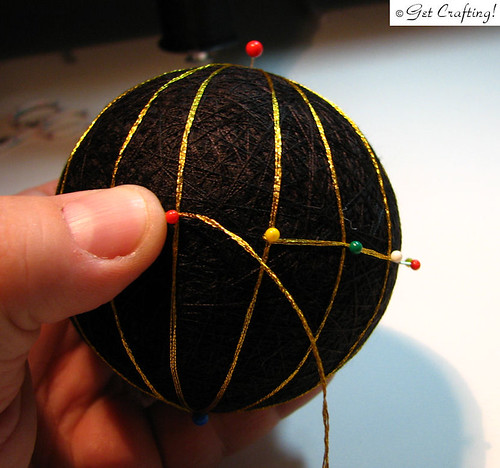
At this point, you're going to ignore your needle for a while. Wrap your thread around the ball, placing it snug against an equator pin, the South pin, and the opposite equator pin as to go around. Keep the thread nice and snug against the surface.
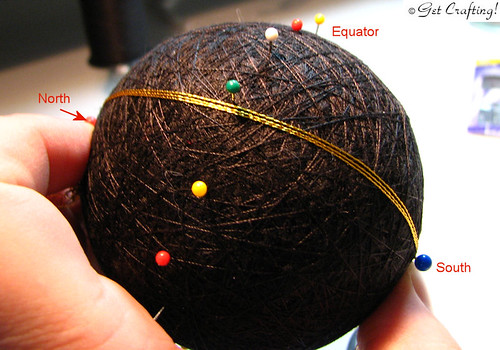
When you reach the North pin again, rotate slightly clockwise and wrap again, this time running against the next equator pins.
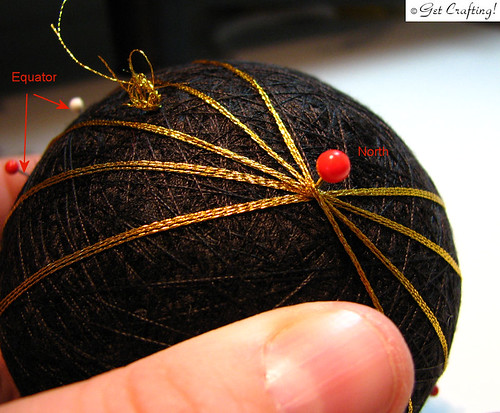
Continue wrapping in this manner, with one guideline for each pin on the equator.
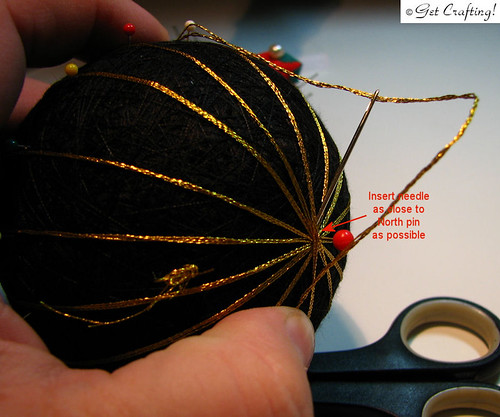
This next part is a big awkward. While maintaining tension to keep the guide lines snug against the surface, take your needle up again and insert it at the North pin, as close to the pin as you can get, making sure that your strand goes over the guide lines to lock them in place. Draw the needle through a short distance from the pin and pull it tight.

To anchor the end, draw the needle back through the padding again, inserting the needle in the same spot you exited from so that there is no visible stitch. I exited under one of the guide lines so that any bit that's still showing after the end is trimmed will be hidden by stitching later on. This method of working the tail end back and forth through the padding to anchor it is how all the ends get finished.
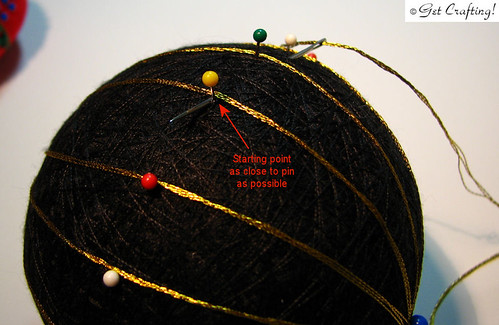
To work the guild line for the equator, thread another strand. Choose any equator pin for your starting point and insert the needle a short distance away, bring it up at your chosen pin. Note that the needle emerges on one side of the guide line. Pull through until the ends of the strands are close (using your pliers to get the needle through, if necessary). Trim away excess so that the end is completely hidden in the padding of the mari.
Wrap the thread around the equator of the mari in the opposite direction your needle came out from, so that there's less chance of accidentally yanking the whole thing out. I like to weave back and forth around the pins so that there's no chance of the equator strand slipping out of place as I work. Keeping the tension snug against the surface while you work, finish the thread by inserting the needle at the starting pin, this time on the opposite side of the guide line, working into the beginning of your strand, and reversing the direction of your thread. Bring the needle up a short distance away and close to the strand and trim away excess thread. Trim away your starting knot as well.
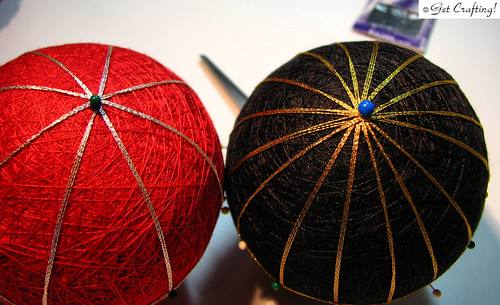
Here are the South pins of the prepared mari in 8 and 16 divisions.
Time to work on the designs!
No comments:
Post a Comment