So I decided I wanted to make a new bag. I finished one not to long ago, but haven't got around to taking photos of it. I keep forgetting. My daughter has been using it, which makes me happy. :-)
For this bag, I had a few things I wanted out of it. I wanted the body of the bag to be very sturdy and dense, with some stretch to it, but which wouldn't stretch out of shape, wear out quickly, or need a lining to prevent things from poking through.
To meet the sturdy requirement, I decided to make the bag in Tunisian in the round, with a
stockinette stitch. This would require my double ended hook (a 6.00mm) and two yarns.
Yarn was the next concern. I wanted something smooth and durable. I considered using
paracord, which comes in quite the variety of colours now, but decided it would be a bit much for this project. Before going shopping, I went digging through my stash.
I didn't have to go shopping.
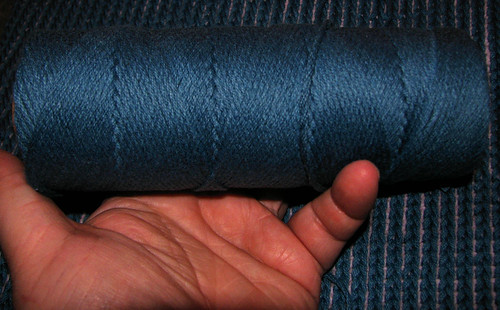
The first potential yarn I found was a Super Value Skeins yarn in a pale lilac, that I got from a friend. Not the Bernat Super Value, but something made in Turkey. I can't find anything online about it, and the label doesn't have much on it. It's a 60% acrylic 40% cotton, machine washable and dryable.
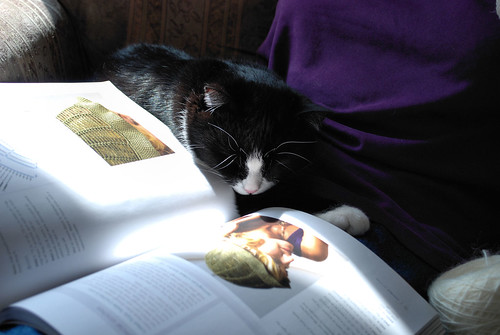
The other thing I found was this.
This photo was taken after the body of the bag was finished (yes, that's it in the background) so it's a fair bit smaller than when I started. We found it at the Reuse Centre, so I have no idea what it actually is. I think it might be macrame cord. Whatever it is, it fit the bill!
For the foundation chain length, I thought about how I wanted to use the bag and settled on an chain of 80. I wasn't sure yet if I would just close up one end, envelope style, or give the bottom some width, but figured this would still give me the width I wanted.
I at first experimented with using the lilac for the foundation or the blue cord, as well as with Tunisian Simple Stitch (TSS). I settled on making the blue the predominant colour and started with it, bringing the lilac in with the other end of the hook. Using Tunisian Simple Stitch, the second colour would have been a lot more visible, and I decided I liked the second colour as something that was hinted at, rather than really obvious. TSS also was a bit more floppy than I wanted. The stockinette solved both issues.
It had been my intention to take photos at the very start of the project, but that didn't happen. One of the fun things about working with Tunisian is the curl. It seems to curl a lot tighter when working in the round, too. Instead, here is a photo after the body portion of the bag was completed.

The depth was something I eye-balled, keeping in mind that I still wasn't sure how I would finish the tops and bottoms. At this point, whatever I wanted to do, that curl was going to be a pain! *L*
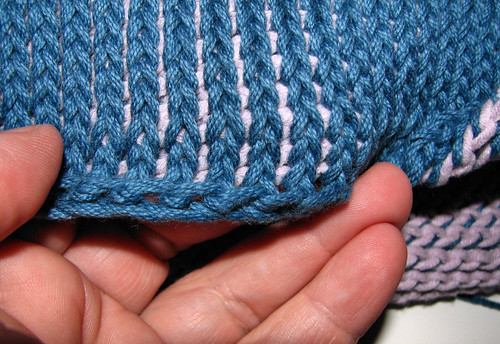
This is a detail of what the foundation chain looked like at the bottom.

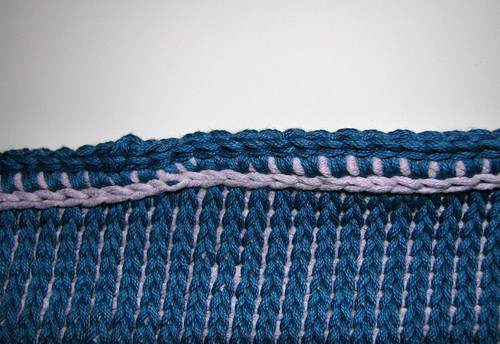
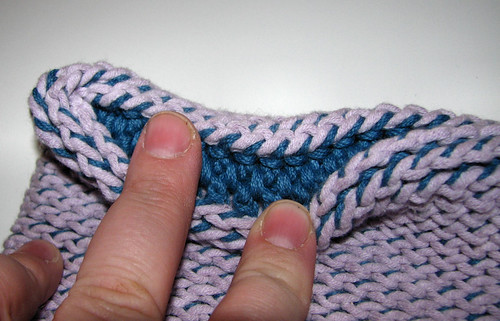
And this is what the top looked like after unrolling.
With the lilac naturally sitting sort of on top of the work, I decided to work around it. Carefully dropping the lilac off the hook and onto a stitch marker, I worked a round of sc in the blue. I put the hook through the vertical loops as if I were doing the stockinette stitch, then finished as a sc instead, which encased the lilac in the stitch. This left a fairly open space under each stitch. Before completely the round in blue, I switched my hook from the blue to the lilac. I just needed to do a few stitched in the lilac to get it past the start of the blue so I could finish the blue round. I slip stitched the lilac around the vertical posts the sc were worked through, closing up the gaps and giving the edge more structure, which helped get rid of the curl.
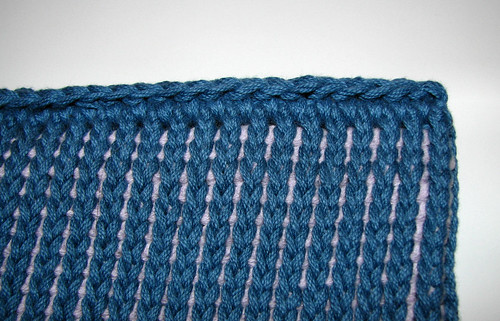
After doing the round of sc, however, I didn't stop there. After joining the round, I did 1 ch and, without turning, did a round of ss into the round of sc, under the top loops. See below.
The finished top edge, showing the start/finish stitches. At the very top edge, you can see the front loop of the sc stitches, which have been pushed back slightly by the round of blue ss. This gave the edge more width and stability. The slip stitches in both the blue and lilac were finished by pulling up the last loop, one space back from the first loop, and cutting the yarn with a several inch tail on the inside. After threading a yarn needle to the tail and removing the hook, the tail of the yarn was brought to the front though the next space, though the loop, pulling the loop closed slightly to match the size of the ss loops already down, then the tail was worked around the very first ss, back through the loop of the last ss, and through to the back of the of piece like an
embroidered chain stitch. The ends were then woven into the back to finish off.
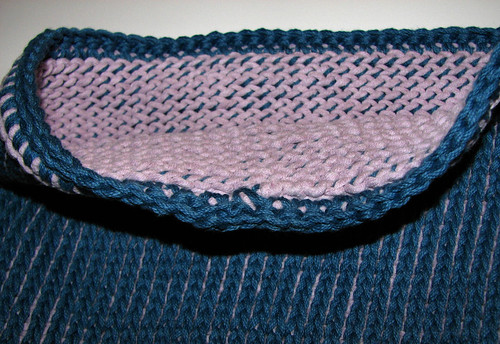
Here is a view from the inside, at the join.
By this point, I had settled on making an envelope style back. When flattening the tube, I made sure the join was at one side, where it would be least visible.
Now to the bottom.
Once again, I combined sc and ss. Here is the first row of sc that closed up the bottom. I positioned the stitches so that there was one stitch on each edge. With an 80 stitch foundation, this meant 1 stitch at the start, where I joined the blue cord, 38 stitches across the bottom, carefully lining up the front and back (which got progressively easier as the curl was straightened out), then finishing with a single sc at the end. I then did 1 ch and turned the whole thing...

... and worked slip stitches under the top loops of the sc all the way across. At the last stitch, the yarn was cut and pulled through the loop. Before taking the tail to the inside to finish off, I made sure to tack it down thoroughly with a couple of stitches on the outside, then flipped it inside out to finish off.
This is what the bottom seam looks like on the inside. It just disappears into the Tunisian work.
Only now do I realize I didn't take a photo of the entire bag after the top and bottoms were finished. Excuse me while I go take care of that!
Done.
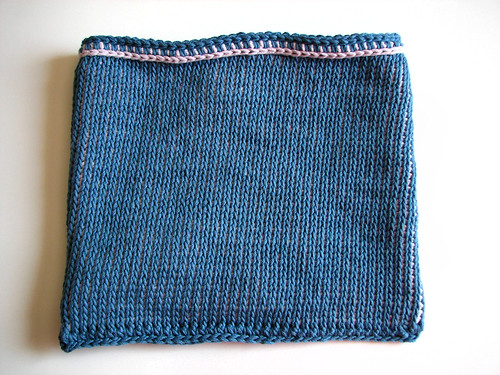
Here is the completed body of the bag, waiting for the straps. I've decided to make a pair of straps that will be long enough to wear across the chest. I haven't quite decided how I'm going to attach them to the front and back of the bag; I might use some of the decorative buttons we have, or a funky knot.
I'm also still debating whether or not I want to add embellishments to the bottom of the bag. I'd been thinking perhaps some beads, a fringe, decorative loops... I don't know yet. The more I look at the bag, however, the more I'm thinking to leave well enough alone. I'll know better once I've got the straps done and attached.
My thoughts so far:
I'm really happy with how this is turning out. The blue cord is much more durable than the yarn, which makes it ideal as the primary colour. The contrasting colour is just hinted at, and flashes a bit more when something moves the fabric. Though not as visible, it adds a lot to the physical structure of the bag. I had considered using the lilac for a more decorative contrasting edge at the top, but more and more, this is a piece that says "keep it simple" to me.
About the only thing that has me thinking more about the body is practicality. In thinking of how the bag would be used, I'm seeing the need for pockets on the inside. Or something to help keeps things a bit more organized. Not sure how I would go about doing that, if at all.
Meanwhile, I'm working out the first strap, but will see if I'm happy with it before I write more.