My older daughter got a couple of "take out" coffee cups for Christmas. They're made to look a bit like the disposable cups with lids, except the cups are double walled ceramic and the lids are a soft silicon. They hold the equivalent of a medium coffee.
The problem, however is how to carry them. They're not the sort of thing you just shove into a purse or pocket, like the java jackets. So I made a pair of shaped drawstring bags for them. Here is the first one, in a shade of red I had left over from another project that perfectly matches the red in one of the cups. I used a 5.00mm hook.
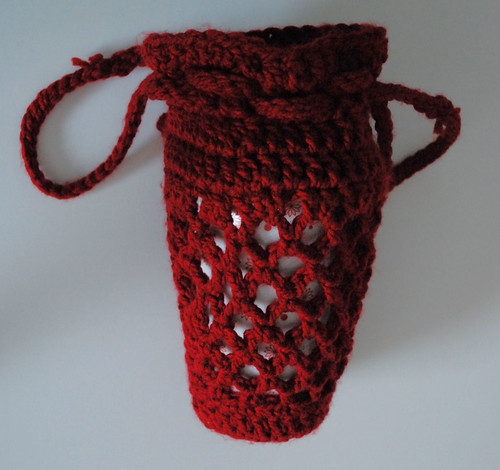
I didn't take any pictures while making it, partly because I just sort of made it up as I went along. This bag fits the size and shape of the cup rather closely.
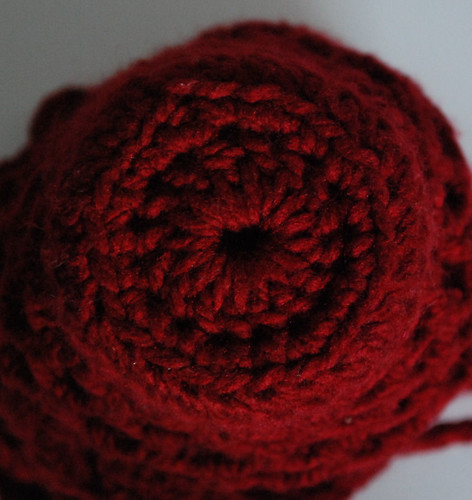
I used the base of the cup as my guide, I started with a ring of 8 chain stitches, then worked 16 double crochet into the ring. The next round was a ring of 2 single crochet into each double crochet around. The third round was building up the sides, so they were worked into the back loops only of the single crochet (one dc in each sc) around. The front loops made for a nicely defined edge at the base of the bag. They could also be used to add decorative features, such as a fringe, after the bag is done, if desired.
Another round of sc was worked into the round of dc, then I started working the mesh. The first round of mesh is 1 sc, ch 5, skip 2, 1 sc into the 3rd stitch around to almost the end. For the last loop in the round, instead of a ch 5, it's ch 2, 1 dc into first sc of round.
To work the next round of loops, ch 1, then sc into last loop made, around the top of the dc stitch. Ch 5, sc stitch into next ch 5 loop and repeat until the second last loop. As before, the last loop is ch 2, 1 dc into first sc.
That round is repeated once or twice, depending on the height and width of the cup, then an increase round is done. For this cup, I did only one repeat before increasing
The increases are worked by adding an extra ch 5, 1 sc into two loops. Which loops they're worked in doesn't matter, so long as they are opposite each other on the bag.
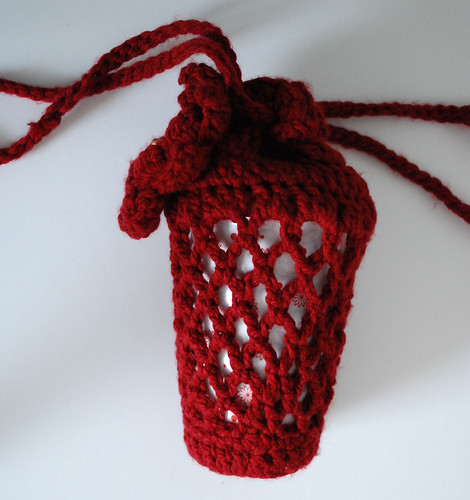
The mesh pattern is then repeated until it just reached the height of the cup, without the lid.
For the first dc round after the mesh, 3 dc are worked into each loop. There are a variety of ways to start it in the first loop. My preferred method is to do one very loose chain, which is not counted, then work a dc around the top of the dc stitch of the last loop. Work one more dc before doing groups of three dc into all the other loops. After doing the last group of three, work 1 dc into the first loop to complete the grouping and slip stitching into the top of the first dc.

The next round is 1 dc into each dc of the previous round.
To make the drawstring round, do a dc into the same stitch slip stitched into (I used the same method as described above), then ch 1, skip one stitch, dc into the next, all the way around. It ends with the last ch 1 slip stitched into the top of the first dc.
The last round is 1 dc into each dc and each ch 1 space.
The drawstrings are chains made to whatever length I thought would work out, then I slip stitched back down the length of the chain, working into the back bar of each stitch, rather than the loops. After the lengths were made, they were woven into the spaces in the drawstring row, making sure that they crossed each other from inside to outside. When I sewed the strings closed, I sewed them end to end (after making extra sure there were no twists in the strings) to make them as smooth as I could. I made a point of leaving those portions of the drawstrings visible, which you can see in the first pictures, so you can see how that turned out. Not as neat as I would have liked, but they can be hidden in the folds of the bag itself when used.
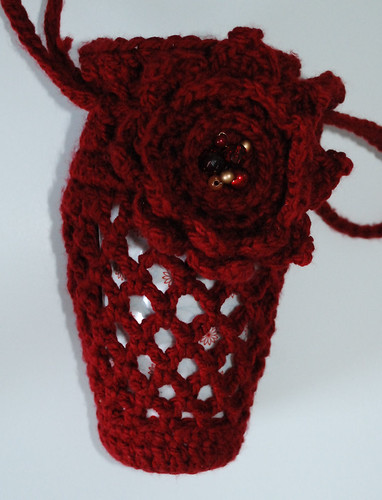
I still had some yarn left, so I used it to make a flower, using the same method I used for the book cover I made for a gift exchange. My daughter then used the wire and bead decorations we'd kept from our Christmas crackers to decorate the middle, then sewed it onto the bag.
We were really happy with how this turned out. The only quibble with it is that it fits the cup a bit too closely. That's great for carrying it, but it makes taking the cup in and out of the bag a bit of a hassle.
Tomorrow, I'll post a step-by-step of the other bag I made, which fixed that problem.
No comments:
Post a Comment