Winter cold had dropped on us rather suddenly of late - no gradual change this year! For many of us, it's time to grudgingly dig out the winter wear and bundle up before heading out into the biting winds.
Some, however, are far less fortunate. For one reason or another, they are facing the bite of winter's teeth inadequately prepared for the cold. As crafters, one way we can help is to make warm winter wear to donate, and for the non-crafty, materials can be donated for others to work up.
For those in the US, the Warm Up America Foundation is running their Caps for Good Campaign. For those who knit or crochet, free cap patterns are at their site with an address to send them to. The Campaign runs from November through February.
Charity Crafts has links to other organizations crafters can donate to for various causes.
Here is a directory of other charities that accept knit and crochet donations, along with The Craft Directory.
Don't forget to look into local charities, shelters and hospitals. Some people even like to make up items and leave them in public places (tied to a tree branch, for example) with a note attached explaining that they are gifts for anyone.
Share some warmth. :-)
Friday, November 19, 2010
Thursday, November 18, 2010
Mosaic Skully
One more post for today!
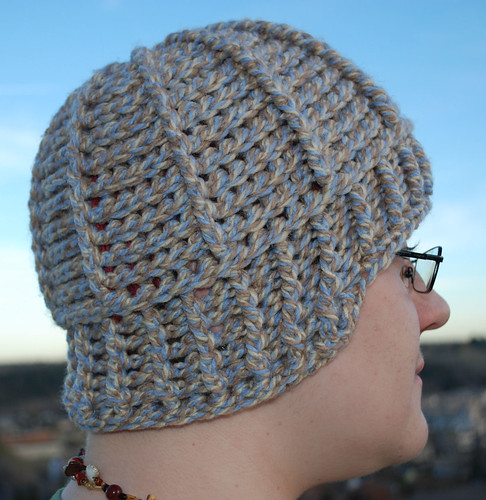
I had a second ball of Mosaic left and decided to see how it looked without any cables in it. I decided to do a version of the Skully toque.
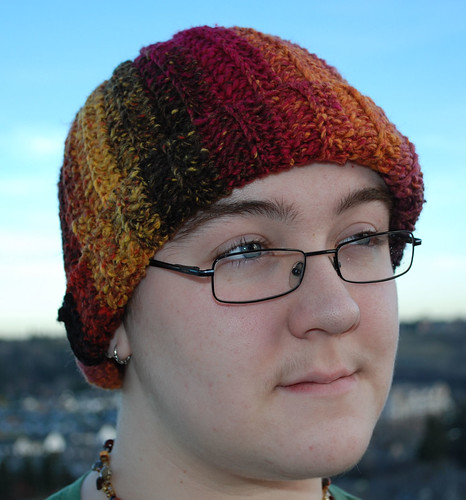
The toque is worked vertially, and made long enough to fold back when worn. Which, as always, leaves the earlobes uncovered. :-P
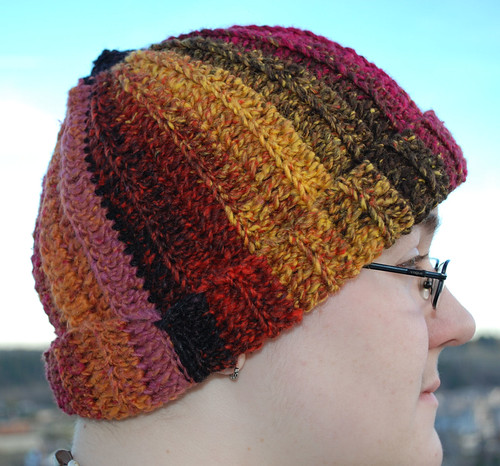
The side view shows the colour transitions quite well. The closing seam is also shown, where the pink and the brown meet.
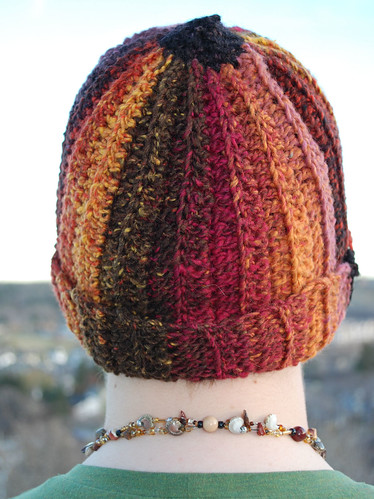
After I slip stitched the seam together, the opening at the top was closed up with single crochet.
This hat took quite a bit less than one ball of yarn. I had enough left over to make a flower for my daughter's hat and still have a bit left over.
I had a second ball of Mosaic left and decided to see how it looked without any cables in it. I decided to do a version of the Skully toque.
The toque is worked vertially, and made long enough to fold back when worn. Which, as always, leaves the earlobes uncovered. :-P
The side view shows the colour transitions quite well. The closing seam is also shown, where the pink and the brown meet.
After I slip stitched the seam together, the opening at the top was closed up with single crochet.
This hat took quite a bit less than one ball of yarn. I had enough left over to make a flower for my daughter's hat and still have a bit left over.
Crossed Cables Mosaic Hat
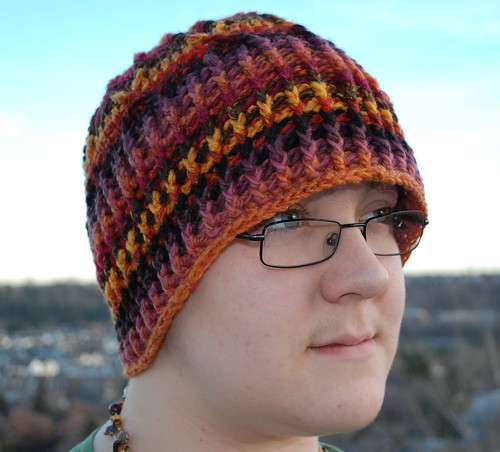
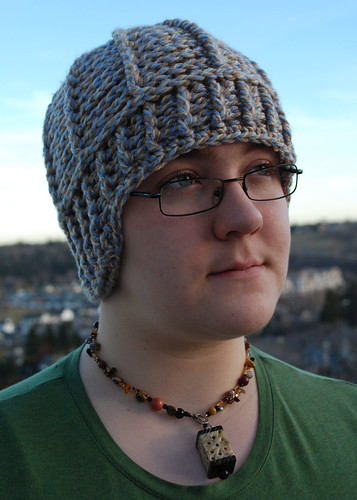
I saw a display of some Bernat Mosaic yarn and instantly fell in love with the colours. I limited myself to only one colourway, though, and bought two balls in Medusa. Like most Bernat yarns, the prices was quite reasonable. It's an easy care, machine washable and dryable acrylic that has a lovely, soft feel to it.
I made the hat a touch long, though not quite long enough to have to turn back at the forehead. I was more concerned about covering the ears.

Once again, this hat is a modification of my basic flat topped, straight sided hat, which I've found works well for all the yarn types and hook sizes I've experimented with. I worked the crossed cables starting in the first side rounds without increases.

I love, love, LOVE the colour transitions in this yarn. This hat took up one ball of yarn using a 6.00mm hook.
I would definitely recommend this yarn. The price is quite good for a self patterning yarn - I paid under $6 a ball, and it has a wonderful feel to it. The easy care is always a bonus, too - just the sort of thing for wearables that will see a lot of use. I look forward to experimenting with yarn some more in other colourways! I can just see this being used in a nice shrug or sweater.
I made the hat a touch long, though not quite long enough to have to turn back at the forehead. I was more concerned about covering the ears.
Once again, this hat is a modification of my basic flat topped, straight sided hat, which I've found works well for all the yarn types and hook sizes I've experimented with. I worked the crossed cables starting in the first side rounds without increases.
I love, love, LOVE the colour transitions in this yarn. This hat took up one ball of yarn using a 6.00mm hook.
I would definitely recommend this yarn. The price is quite good for a self patterning yarn - I paid under $6 a ball, and it has a wonderful feel to it. The easy care is always a bonus, too - just the sort of thing for wearables that will see a lot of use. I look forward to experimenting with yarn some more in other colourways! I can just see this being used in a nice shrug or sweater.
Cabled Earwarmer Hat
I've been making a few more hats in between working on a new version of my scoodie design. Here's a variation of a basic hat using front and back post stitches, finishing with an earwarming modification at the bottom.
One of my frustrations with longer hats is that it's hard to keep the ears covered when it's folded up to uncover the eyes. Here I've finished the front of the hat quite low on the forehead, but not so low as to obstruct the vision.
Then I continued the ribbed pattern (alternating front and back post stitches) for slightly more than half the circumferance of the hat, reducing each row by one on each end for a bit of a curve. I finished with a round of single crochet to tidy up the edges, without any increases when working around the turn, so that the earwarmer portion cups the ears every so slightly.

I originally intended to make this into a beret or tam, but didn't like how it was turning out, so I ripped it and went with my basic hat pattern (flat disc top, straight sides) starting with 10 hdc worked into a ring, then working in front and back post double crochet to get this pattern. When it came time to switch to the ribbed brim, I did the first round in back post half double crochet only, then did the rest in alternating front and back post dc. The yarn is a Bernat Chunky (2 balls) and I used a 9.00mm hook.
The resulting hat has a lot of stretch to it, and the earwarmer portion really does the job. The only down side is that the hook size and pattern that gives it such comfort and stretch also makes it less than ideal in higher winds. Great for cooler weather, but I wouldn't wear it in a blizzard. ;-)
One of my frustrations with longer hats is that it's hard to keep the ears covered when it's folded up to uncover the eyes. Here I've finished the front of the hat quite low on the forehead, but not so low as to obstruct the vision.
Then I continued the ribbed pattern (alternating front and back post stitches) for slightly more than half the circumferance of the hat, reducing each row by one on each end for a bit of a curve. I finished with a round of single crochet to tidy up the edges, without any increases when working around the turn, so that the earwarmer portion cups the ears every so slightly.
I originally intended to make this into a beret or tam, but didn't like how it was turning out, so I ripped it and went with my basic hat pattern (flat disc top, straight sides) starting with 10 hdc worked into a ring, then working in front and back post double crochet to get this pattern. When it came time to switch to the ribbed brim, I did the first round in back post half double crochet only, then did the rest in alternating front and back post dc. The yarn is a Bernat Chunky (2 balls) and I used a 9.00mm hook.
The resulting hat has a lot of stretch to it, and the earwarmer portion really does the job. The only down side is that the hook size and pattern that gives it such comfort and stretch also makes it less than ideal in higher winds. Great for cooler weather, but I wouldn't wear it in a blizzard. ;-)
Sunday, November 14, 2010
A Gift
A friend staying with us right now saw some yarn in our stash and asked my younger daughter if she could make a scarf for him with it. It took a while - we got the yarn from an exchange, so I don't know what it is, but it's thin and fuzzy, which made it more challanging to work with. It's done now, though, and he happily consented to model it for me.
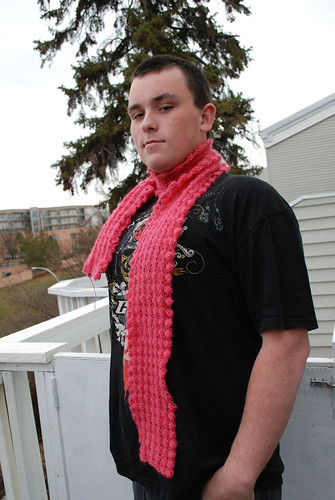
She modified the pattern she used (you may need to sign up at the site to see it) to make herself a blanket for this, and used her favorite wooden crochet hook. The finished scarf if very light and fluffy, and quite warm.
She modified the pattern she used (you may need to sign up at the site to see it) to make herself a blanket for this, and used her favorite wooden crochet hook. The finished scarf if very light and fluffy, and quite warm.
Friday, November 12, 2010
Friday Feature: Finger Weaving and the Metis sash
Manitoba, the province I grew up in, is rich in Metis history. Understandable, since the Metis are why the province came into being. Many Metis are exceptional artists in beadwork and embroidery, and one of the most distinctive and recognisable symbols of their culture is the Metis sash. The patterns and colours woven into the sash have come to represent various meanings and different groups within the Metis community.
 The original sashes were very long, wide and woven by hand. Eventually loom woven versions, which were faster to make and cost less, became common. We have several loom woven sashes ourselves, purchased at Winnipeg's Folklorama and made by local loom weavers. I won't picture them here, since it's finger weaving, not loom weaving, I'll cover today.
There are still some who weave the sashes by hand, and smaller items can be woven using the same techniques - many friendship bracelet designs are good examples of finger weaving. Few materials or special equipment is needed.
For basic finger weaving instructions, here's a good video to start with.
More advanced techniques can be watched at the Metis Museum site as well as this video.
Here are a few other good instructional sites.
Native Tech: Instructions for Finger Weavng Belts
Finger Weaving a Sash
Metis Finger Weaving (pdf)
My own attempts at finger weaving bracelets for my kids have given me a huge appreciation for the skill and patience of those who make the full sized sashes!
Subscribe to:
Posts (Atom)