I was looking to try out a new yarn with this hat, Loops & Threads, Charisma from a local Michaels. It's a very soft, 100% Acrylic, bulky (5) yarn made in Turkey. Machine washable and dryable. Recommended hook size is 8mm.
I don't have an 8mm hook. I have a 7mm, which is being used by one of my daughters for something else. It's also a plastic hook, the same as my 10mm, that I can't stand using. They have an odd, sticky sort of feel to them. I prefer aluminum hooks, and I have a 9mm hook in aluminum, which I used for a different hat. For this project, I went with my 6mm hook.
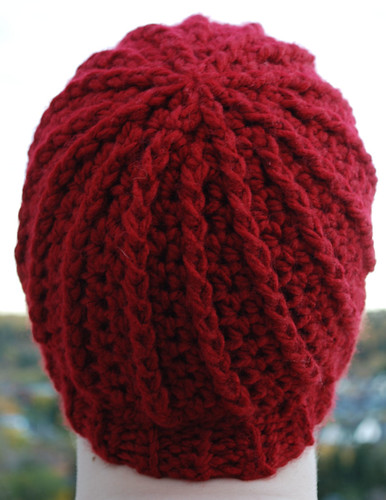
The basic structure of this hat is the same as my previous ones - flat disc for a crown with straight sides. I decided to do a very simple cable pattern so I could see just how much of a natural curve developed. I started this one by working 8 dc into a magic ring. The next round worked 1 fpdc and 1 hdc into each dc of the previous round. The following round worked 1 fpdc and 1 hdc into the fpdc of the previous round, then 1 hdc into the hdc of the previous round. In the following round, I added another cable by working 1 fpdc, 1hdc into the fpdc of the previous round, 1 fpdc around the first hdc of the previous round, then 1 hdc into the last hdc before the fpdc of the previous round.
For the following increase rounds, I alternated where the increase hdc was added so that each cable had the same number of hdc on either side of it until the disc was the size I wanted, which was at 1 fpdc, 2 hdc all the way around using this yarn and hook size. Had I been working with a thinner yarn that needed more rounds to reach the size I wanted, I would have added another cable into the next increase round in the same manner as before; the key being adding a new cable where the next increase round would make an odd number of stitches in between the existing cables. This way, the new cable is added by working a fpdc around the middle stitch between the existing cables.
That pattern was continued to build up the sides for several more rows until it reached about half way down my forehead when I tried it on.
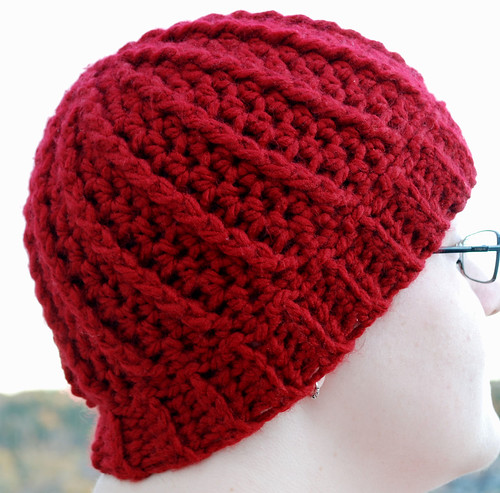
I decided to change directions for the ribbed finish. First, I did one more round in sc. After slip stitching the round closed, I chained 5, then worked 4 sc back down the chain. At the end, I slip stitched into each of the next two sc in the body, then turned, rotating counter clockwise and pulling the yarn strand across the top and tucking it snug against the body of the hat so that it's between the slip stitch and the first stitch worked in the new row. I find this looks better than rotating clockwise. Whichever direction you choose, just make sure it's dine the same all the way around.
The next row is 4 sc worked into the back loops only of each sc in the previous row. Ch 1, then turn. That pattern was repeated all the way around.
The last row in the ribbing ends away from the body of the hat with a ch 1. Working on the inside of the hat, the first and last rows were slip stitched together.
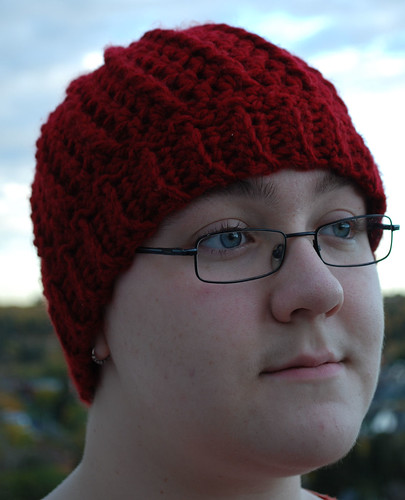
I like the simplicity of this pattern. The gentle curve of the cables that naturally forms when working in the round is quite attractive, I think.
I really enjoyed working with this yarn, too. It's got a nice texture, flows smoothly and doesn't have a tendancy to split like so many bulkier yarns do. The finished hat is very light and warm. A very nice yarn for winter headgear. I just picked up a couple more skeins last night, since it happens to be on sale again right now. It's a less expensive yarn, but I still hate paying full price. *L*
No comments:
Post a Comment