Part Two
Part Three
Part Four
I like keeping things flexible and giving people options. For that reason, I decided to make the final decorations removable.
First, the flower motif.
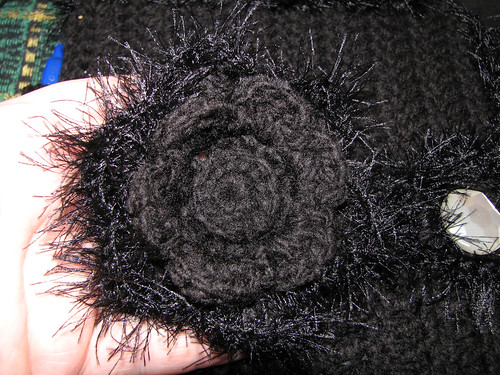
For this, I went digging through my books and found a motif I thought would work well, then did a variation of it that suited the chunky yarn I'd chosen.
For this motif, start by working 12 sc into a magic ring. ss to finish. ch 1
2nd round, work 12 sc into each sc *from behind* and working around the posts (back post stitches). ss to finish. ch 1
3rd round, work a sc into the same space as the ss. ch 2 [skip 1 sc, 1 sc in next stitch, ch 2] around. ss to finish. There will be six chain 2 loops.
4th round, ss into first chain 2 space. [1 sc, 4 dc, 1sc] into each chain 2 space. ss into first sc of this round. ch 1 There will be 6 petals.
5th round, Working into the skipped sc of round 3, work 1 sc into first skipped stitch. ch 3 [1 sc into next skipped sc, ch 3] to end of round.ss in first sc.
6th round; ss into first ch 3 space. ch 1. [1 sc, 2 dc, 2 tr, 2 dc, 1 sc] into each ch 3 space. ss into first sc. Finish off yarn There should now be a second round of 6 petals.
Change to contrasting yarn (change hook sizes, if needed). Work the contrasting yarn evenly around the edges of the second round of petals in sc. Finish off yarn. Sew in all loose ends.

To make the flower motif removable, I went into the brads I bought and tried a couple different ones to see which I liked for a centre. I settled on the fake white pearl, as it meshed well with the button I'd chosen. I then used the brad to fix the motif in position on the front of the book cover. This was a bit of a challenge with the chunky yarn, as the brad was just barely long enough to go through the layers and still be able to push out the ends and secure them. This would have been much easier with a thinner yarn. I then chose a variety of brads and attached them to the front cover wherever I felt they looked good.

All done! The now completed journal cover. If a plainer cover is desired, or it needs to be cleaned, the flower motif and brads can be easily removed.
Strangely, it feels like it took longer to write all this out than it took to actually make it! Not counting the drying time while blocking, of course.
No comments:
Post a Comment