First up was choosing the background colour. I had a couple of packages of 8 1/2 x 11 cardstock with 10 colours. Five of them were "gem" paper, and had a metallic sort of finish to one side. With the girls to help me decide, I slipped one of each colour into the card to see which we liked best. In the end, I decided to go with two colours.
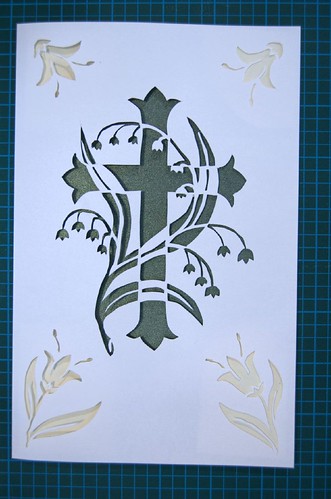
The dark green is a sheet of the glittery "gem" paper, while the corners are in plain cardstock in an off white. The corner pieces are cut just large enough to fit behind the cut outs, while the green piece was cut to just under the dimensions of the card. They're not fixed yet, as I'll need to be able to take them in and out, but when I'm done with them, I'll find a way to glue the corner pieces in place, then affix the green paper, which will cover the entire inside back of the cut area, covering up the small pieces of paper in the process. I'm still thinking of what to use to attach them. Ideally, I'd use a spray glue, but I don't have any. I think it would be worthwhile to go looking for some.
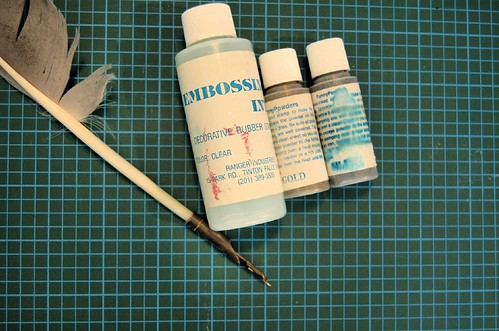
Next, my tools and materials. Yes, I have a real goose-quill calligraphy pen; a Christmas present from my wonderfully thoughtful family. (The nib on the quill in this photo is not the one I ended up using.) While the quill pen worked wonderfully, any fine pointed object can do the job. I seem to recall using a blunt ended tapestry needle the first time I tried this, ages ago.
The embossing ink is a refill for stamp pads. It, and the embossing powders, are actually quite old and I wasn't sure how they'd work out. I'd gone looking for more of the ink refill bottles but found nothing. In talking to a very helpful staff member at DeSerres, I was told that ox gall would work, as well as ordinary gelatin from the grocery store. As long as it could absorb into the paper well, and not dry too quickly, it would do that job.
For the embossing powders, I chose gold and silver, though there are a wide variety of colours available these days. Most craft stores have a decent selection.
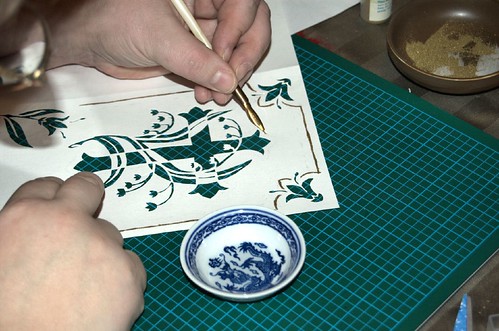
Courtesy of my daughter, here's a shot of me using the quill to apply the embossing ink. Yes, there is ink in that tiny little bowl! In this shot, I'd already done the outer lines and applied heat to melt the powder. I wanted to test it out as quickly as I could - if this part failed the entire card would be ruined. I don't have one of those little hand held heat guns that are available now, so I used my iron as a heat source to melt the embossing powder.

Once the lines were drawn in the clear ink, I put some paper under the card to catch the excess embossing powder, then sprinkled it over the ink. Once the lines were covered, I used a soft paintbrush I borrowed from my daughter to first brush the powder over any lines that looked like they could use some more. After tipping the card to tap off the excess powder, I used the brush again to take off any left behind. The powder is so fine, it sticks to everything! Once the excess powder was off, it was off to the hot iron.
I originally tried holding the iron over the embossing powder, but that didn't seem to do much of anything. I was also concerned that I'd accidentally touch the surface. I don't want embossing powder on my iron. What ended up working was to hold the iron with its heated surface up, then laying the back of the paper right on it. The iron doesn't get hot enough to burn paper, but there's enough heat to melt the powder through the paper. Not ideal, but better than using the burners on my oven, which I've done in the past. ;-)
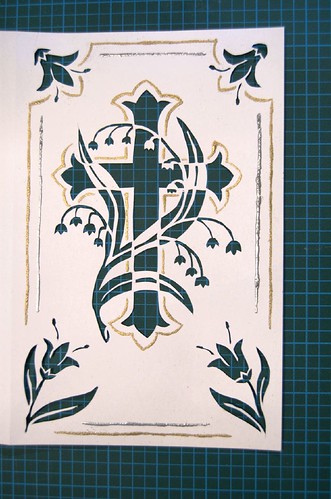
All done with this portion of the card! I am keeping things simple on the surface, as I will be using embossing powder on the background paper for more details.
No comments:
Post a Comment