Part two
These days, I tend to carry very little. Gone are the days of bags as big as suitcases, where I kept everything under the sun, including spare diapers and a change of clothes for the kids. *L* Now, I have my phone, my keys, and a few cards, which I usually keep in my jacket pocket when I go out. If, however, I don't have pockets, I need only a small bag, and I still want easy access to those core items.
With the phone problem solved, I turned to a holder for my cards. I actually keep them in old bus pass holders, so that's what I used for my measurement. I made a simple rectangle using hdc stitches that would be folded off centre to make a pocket slightly larger than my card holder.
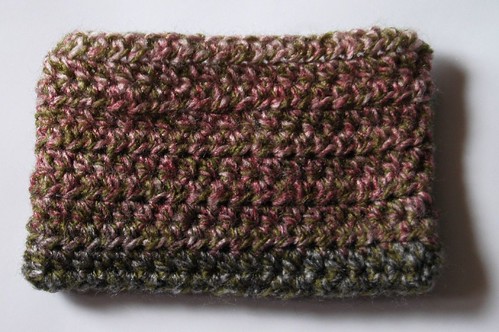
Here's what the front looks like.
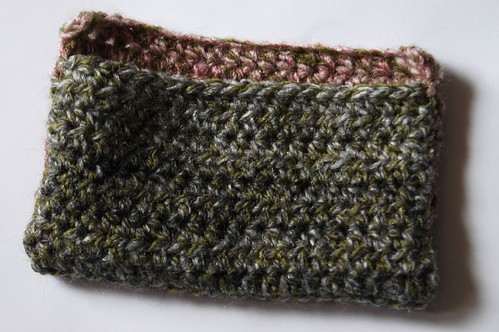
Having the back slightly taller than the front makes for easier access.
The colour change ended up being on the back.
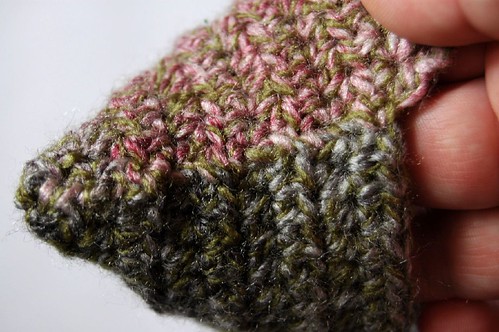
There are two ways I could have done up the sides. I could have stitched it on the outside, making a very flat pocket, or on the inside, where the seam would actually hold the sides apart slightly once flipped rightside out, giving the pocket depth. I decided to do with depth. Here, I'm showing what the whip stitched inside seam looks like.
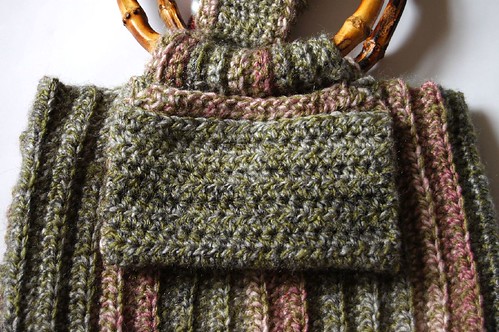
In attaching the pocket to the bag, I only tacked it in place at the top corners. The width happened to put the corners at the transition area of hdc to sc in the handle strap, so I used my stitches to strengthen that area slightly. Technically, you can see the stitches from the outside, but with the colours matching, you'd really have to be looking for them.
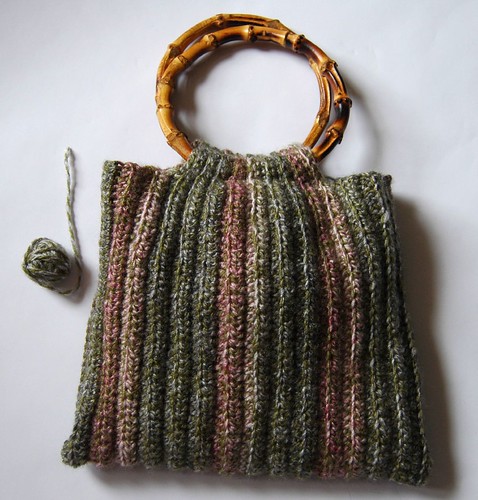
There is the finished bag, except for the liner, which I wasn't sure I was going to make yet. You can also see how much yarn I have left of the 1 ball I bought. This project turned out to be the perfect size for it.
After testing the bag out with the various items I would use it for, I decided it did need a liner after all. My keys would poke out between the stitches, and I didn't want that. So I went digging into our linen closet, searching through our bits and pieces of fabric, to find something suitable. What I found was some fabric my daughter had bought for something else entirely, and she generously said I could use it. :-D
Using the bag itself to measure, I cut a strip slightly wider than the bag, and about twice the length. I hand stitched the liner because I didn't think it was worth digging out and setting up the sewing machine for such a small project. *L* After sewing up the side seams, I basted the top hem in place before tucking it into the bag. I lined up the seams and corners, pinned the edges in place, slightly below the actual top edge of the bag, then flipped the bag inside out (which flipped the liner outside in) to make stitching easier. I used a blind hem stitch to sew it in place. I couldn't find my black sewing thread, so I hid the thread I did use in the yarn of the bag's body. Once it was stitched in place, I removed the basting stitches.
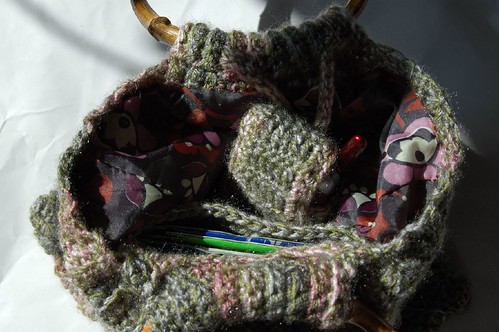
Here's the inside of the finished bag.
I'm rather pleased with the finished result. It was a good project to highlight the yarn, too.
No comments:
Post a Comment