This is going to be a photo heavy post!
First, the "before" photo.
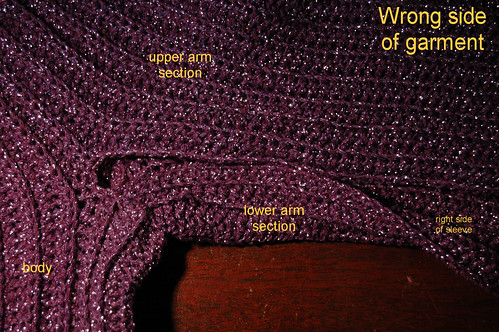
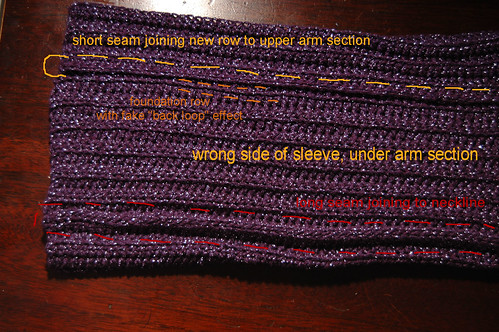
What you are seeing here is where the upper arm section was worked into the body section, then into the foundation chain for the rest of the sleeve. The lower section's foundation chain is joined into the top stitch of the first shorter underarm row in the same corner. As you can see, this left a gap between the two foundation chains. If you look at the full size image, you can also make out that, where the sides joined here, the hill/valley sequence would not line up.
Note that the seam is NOT made in this photo - I've just put the edges together for the photo.
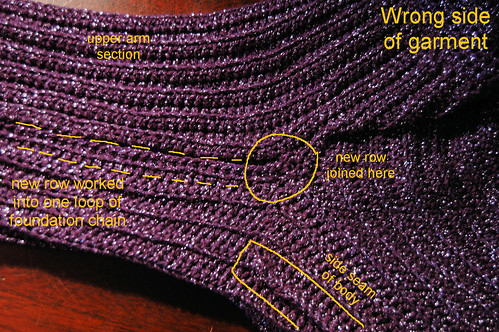
After a couple of false starts, I joined the yarn for the new row at the base of where the foundation chain started in the upper sleeve, then worked the new row into the foundation chain of the lower sleeve. I actually did a joined hdc right in the gap and joining stitch of the foundation row to close it up, so I wouldn't have to go back and close it up while tucking in the loose ends. I then worked hdc into the foundation row, lining each one up with the opposite hdc. To create the illusion of working into the back loop of a stitch, I dug the hook into what would have been the back of the foundation chain. This left a row of yarn loops that kind of looked like the other rows, though the result was flat, rather than ribbed, as this new row is facing in the opposite direction of all the other rows in the underarm section.

Here's another view of the same area, showing a bit of the right side of the new row.
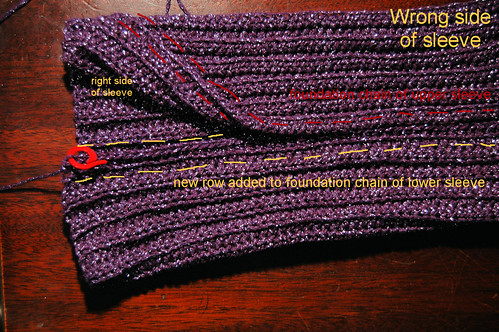
Now over to the wrist end. You can see the "fake" line of loops to make it look like a hill, with the new tops of the stitches to fall into a valley once seamed together. This is the opposite of all the other seams done in the garment. Once flipped to the right side, those seams were hidden in valleys. No such disguised seams here! I had to find a way to close the seam while giving the illusion of a regular valley row on the right side.
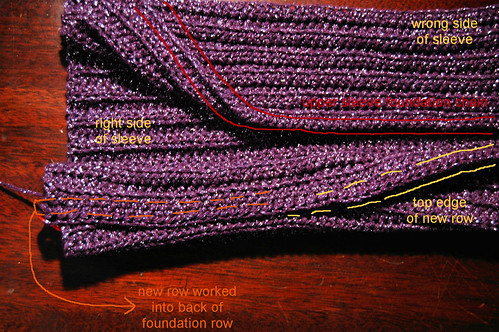
In this view, you can see how much flatter the "valley" is on the right side of the new row.
The completed seam!
The old seam, which runs from wrist to neckline, is more prominent, as I simply did a slip stitch through all the loops. With the new short seam, I turned the work so that the underarm section with its new row was away from me, while the foundation row for the upper arm section was facing me, and slip stitches the corners together. I was then able to do a slip stitch seam into the back loops only of the new row. The result is much less bulky than the other seam, worked through all loops.
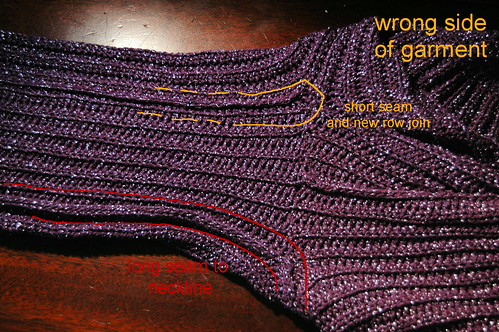
Looking at the same seams at the shoulder and underarm.

Now we're looking at the seams on the right side. The long seam at the top created a slightly deeper valley than the regular rows, but that's about it. The new row and short seam are quite flat in comparison.
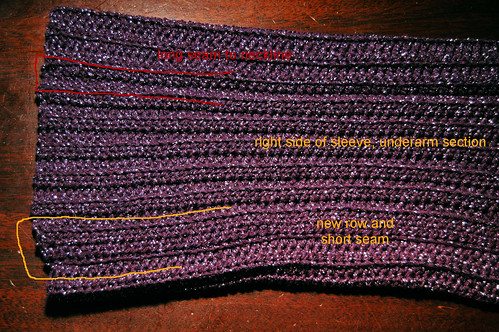
And finally, looking at the right side of the end of the sleeve. Again, you can see that the new row lies flat instead of forming a valley, but it otherwise fits with the sequence.
Once worn, I don't think the difference will be at all noticeable, unless you really look for it. I'm quite happy with how it worked out.
Now I need to do the other sleeve, which I won't bother taking photos of. After that, the hard part will be over and I will make the adjustments to the yoke.
No comments:
Post a Comment