I settled on a thread I got from The Reuse Centre and a 2.35mm hook. I don't know what the thread is, as it has no label, but it actually looks more like a pearl cotton embroidery thread than a crochet thread. The bag can be done in any strong material, though. Most of the instructions I've seen use what looks like worsted weight yarn. The pattern I've come up with can be adjusted for any type of strong yarn.
Along with the yarn or thread and appropriately sized hook, the pattern needs 2 hair elastics. The kind that's about 2 inches across.
Start by attaching your thread or yarn to your hook around the elastic, then chain three. This counts as your first dc.
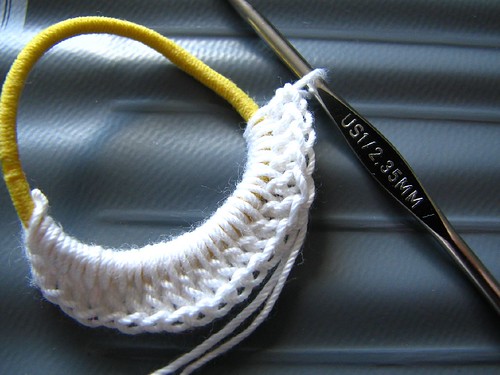
First row: Work dc around the elastic until it's thoroughly covered. How many will depend on your thread or yarn. Just make sure that the total number of dc, counting the ch3 start, is an even number. Slip stitch last dc to top of ch3.
Chain 3. This counts as the first dc in the second row.
Second row: Do one dc into each dc of the previous row. Ss into top of ch3. Second row will have the same number of stitches as the first row.
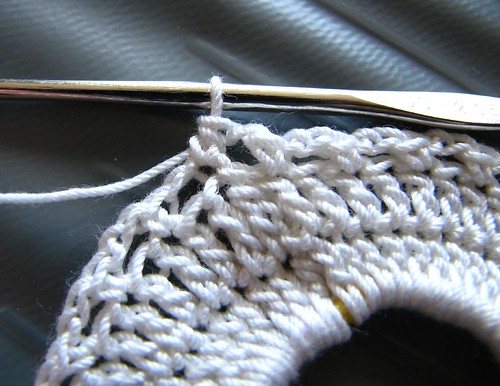
Third row: Ch3. This counts as the first sc and ch2 of the round. Skip 1 dc of previous row, sc into top of second dc from start. Ch 2. Repeat this pattern to the end. Finish the round by doing 1 hdc into the first chain of the ch3.
Fourth row: Ch3, 1sc into ch2 space. Repeat to end. Finish round by doing 1 ch, then 1 hdc into the base of the first loop, which is the top of the hdc in the previous row.

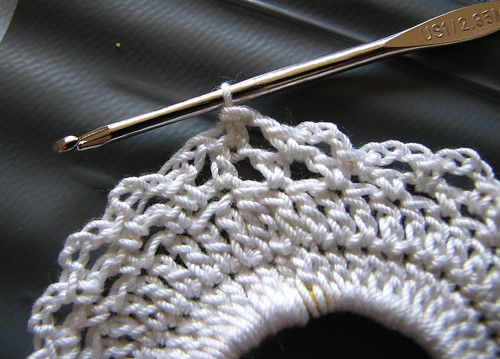
Fifth row: Ch4, 1sc into ch3 space. Repeat to end. Finish the round by doing 2 ch, then 1 dc into the base of the first ch4 loop, which is the top of the hdc of the previous row.

Sixth row: Ch5, 1sc into ch4 space. Repeat to end, finishing the round by doing 2ch, then 1dc into the base of the first ch5 loops, which is the top of the dc of the previous row.
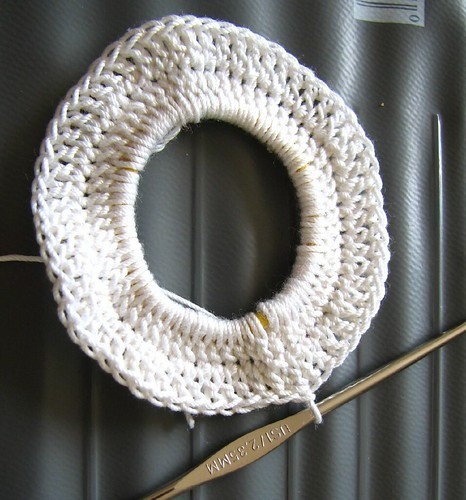
Repeat row six until the bag is as long as you want it to be.
Right now, I've reached about 2/3 of the length I want, but I've had to stop as my elbow has started to bother me again. My plan to finish is to reverse the above rows, bringing it back to the two rows of dc, incorporating the second hair elastic into the final row. If that works out, I'll then make a length of ch for a hanger. I'm not sure about using the second elastic, though, as I want the top to be easier to get into than the bottom. I might use a larger elastic, or none at all. I could just leave it, then make a separate chain that could be woven into the second last row, then tied off, to act as both a hanger and a drawstring.
Unfortunately, it might be a while before I can work it out. Dang elbow.
These instructions make for a fairly wide tube using the thread that I have. If you want something thinner, I'd recommend skipping the 6th row and doing the body in just ch4 loops. Or adjusting however you see fit based on the width of the yarn you decide to go with. Whatever works to get a tube shape for the body in the size you want.
If anyone tries this and finishes is before my arm stops giving me grief, let me know how you did it. :-D
No comments:
Post a Comment